Synchronising Outlook with Nextcloud using CalDavSynchronizer
If you want to synchronize address books or calendars from Outlook with your Nextcloud for backup or centralized storage, this guide will show you how to achieve this.
Outlook offers a wide range of features besides only sending and receiving emails. Especially known are the possibilities to create and maintain an address book with contacts and several calendars. If you want to synchronize this data to your Nextcloud for backup or centralized storage reasons, this guide will show you how to achieve this.
Prerequisites
- Account in a Nextcloud
- Nextcloud needs to be configured to provide the CalDAV and CardDAV endpoints, which we will use for synchronization
- Nextcloud needs the two applications calendar and contacts installed, which will be used to store and visualize the data in Nextcloud
- Installed Outlook instance with your configured mail account
The prerequisites CalDAV and CardDAV endpoints and Calendar and Contacts applications have to be fulfilled by the administrator of the Nextcloud instance you want to use.
Download CalDavSynchronizer
For the Synchronization of our data, we will use the open-source tool called CalDavSynchronizer. Contrary to the name, not only calendars (CalDAV) but also contacts (CardDAV) can be synchronized. As the software is open source you can check out the source code on GitHub, where you can also download the latest release or simply follow this link: https://caldavsynchronizer.org/download-2/.
Besides Nextcloud the CalDavSynchronizer has support for a wide variety of CalDav servers like cPanel, iCloud, ownCloud, Posteo, SOGo, Synology DSM, Zimbra, and many more.
After finishing the download you can install CalDavSynchronizer on your local system.
Setting Up Nextcloud
Retrieving the private link of a calendar
Inside your Nextcloud you will need a calendar, where the events from Outlook will be synchronized to. You can use an existing one or create a new one like shown in the screenshot:

No matter if you choose an existing or a new one, you will need the private link of your chosen calendar. To retrieve this link you first click on the edit icon beside the name of the calendar that you want to use:

On the popup you copy the private link of the calendar:

The private link should look something like https://yournextcloud.com/remote.php/dav/calendars/<USERNAME>/<CALENDARNAME>.
Setting up an API token
For authenticating the CalDavSynchronizer against your Nextcloud you should use an API token. Such a token can be created in your user settings in the menu entry Security. There you will find the section Device & sessions. Enter a Device name - e.g. CalDavSynchronizer - and press Create new app password.

Copy the API token shown in the Password field and select Done afterward:

With this, you have everything set up inside of your Nextcloud and can continue with configuring Outlook.
Setting Up Outlook
When you have installed the CalDavSynchronizer successfully there will be a new tab called CalDav Synchronizer in Outlook. Click on this tab and open the Synchronization Profiles:

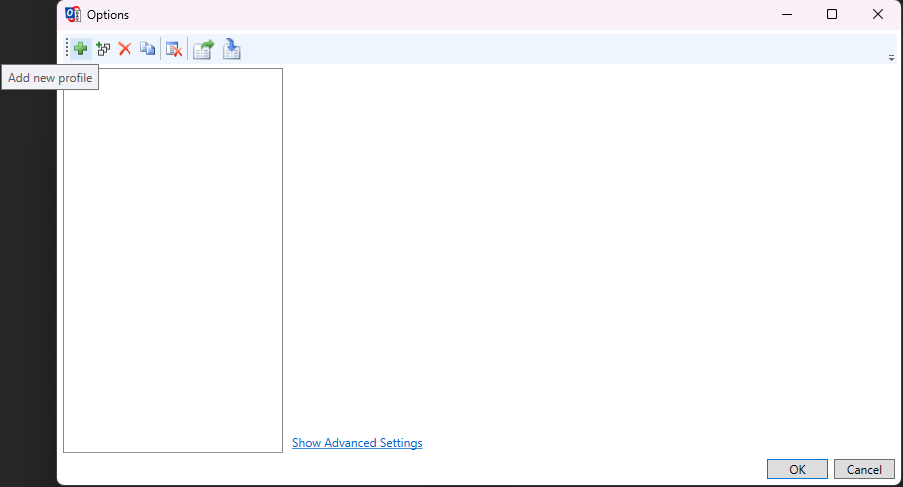
There you will define the connection to Nextcloud and which calendar should be synchronized in a Synchronization Profile. Add a new profile by clicking the green plus symbol:
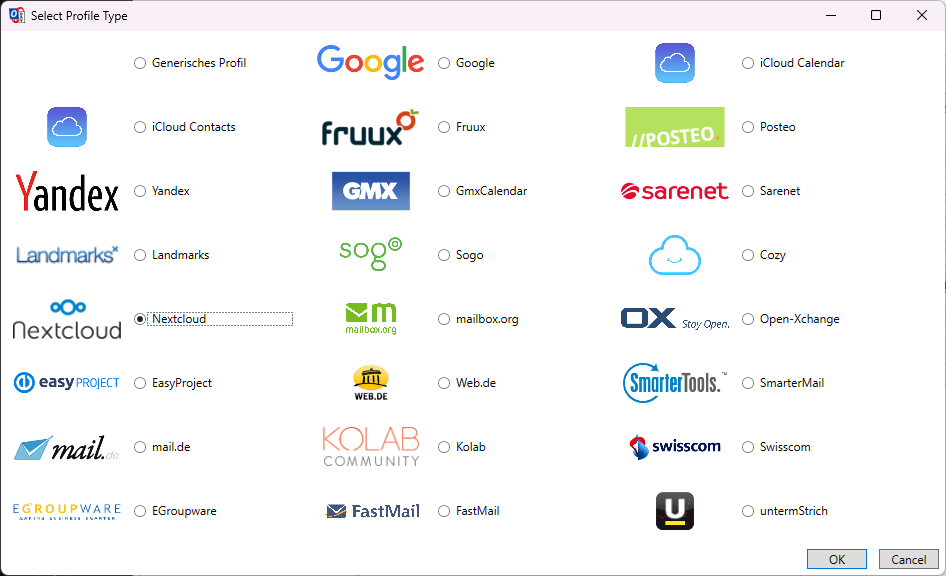
In the new popup, you choose Nextcloud and press OK.
After this, a new entry in the Synchronisation Profiles will be added.
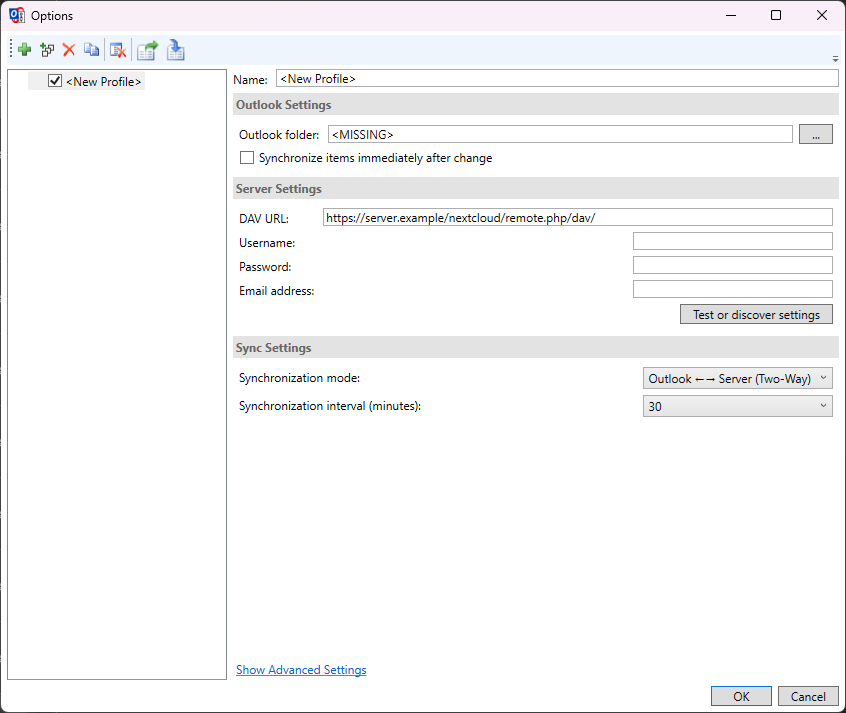
There we need to define the Outlook folder we want to synchronize - like a calendar or a contact list -, the Username, and the previously defined API token as Password.
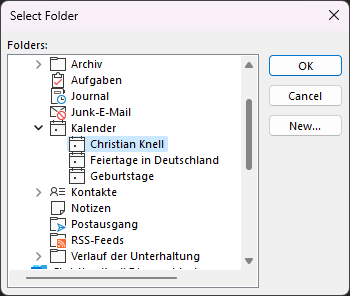
After selecting the Outlook folder and entering our authentication data, we can test that a connection to Nextcloud can be established with the Test or discover settings button:
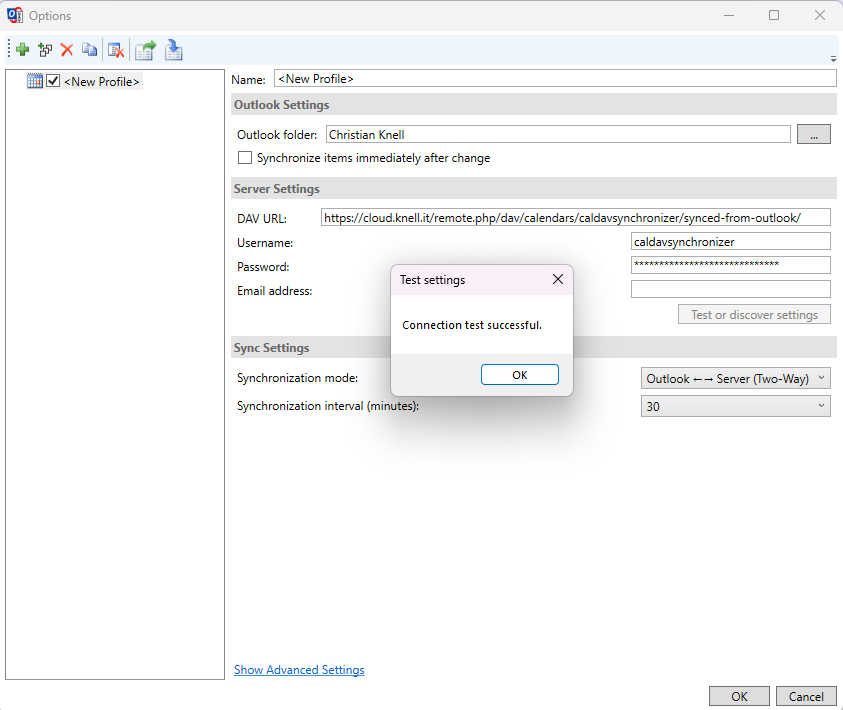
As the final step, you can define which type of synchronization you want to achieve and how often the synchronization should happen.
If you only want to synchronize your calendar from Outlook to Nextcloud you simply choose Outlook --> Server (Merge). If you also want to be able to define new events inside Nextcloud that will be synchronized to Outlook you choose Outlook <-- --> Server (Two-Way).
